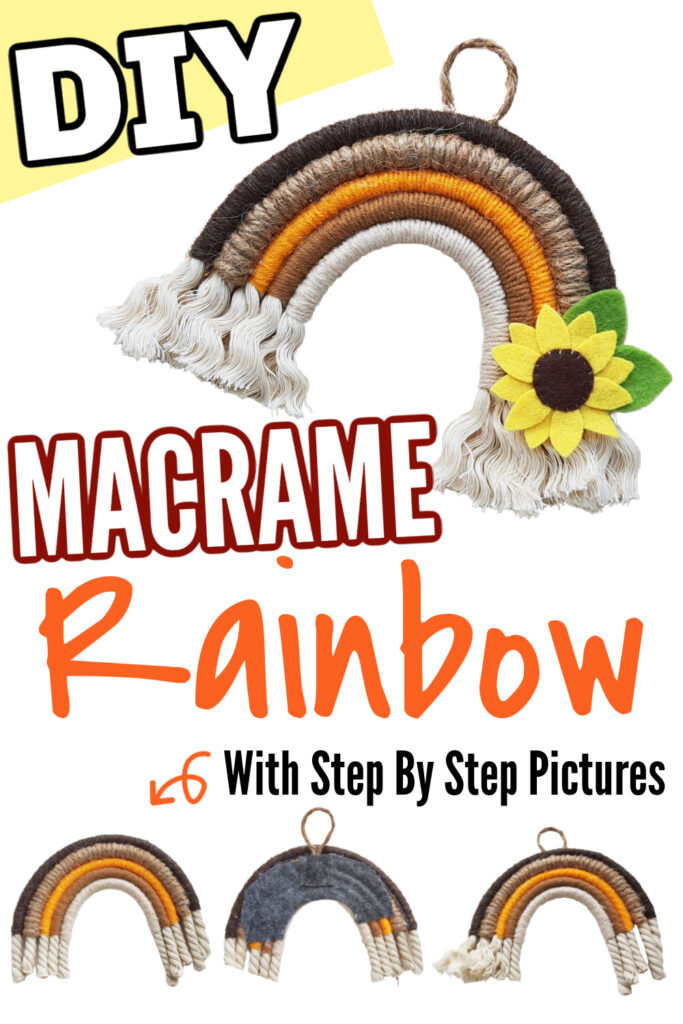
Are you looking to learn how to make macrame crafts? My macrame rainbow is an easy DIY that is so easy to make. Etsy is full of DIY macrame, in all colors and sizes. If you don’t want to spend the money to buy one, no worries.
I will walk you through and share exactly how I made mine. Place your rainbow on display in a room in your home or gift to someone. Also check out these 15 rainbow crafts for kids.
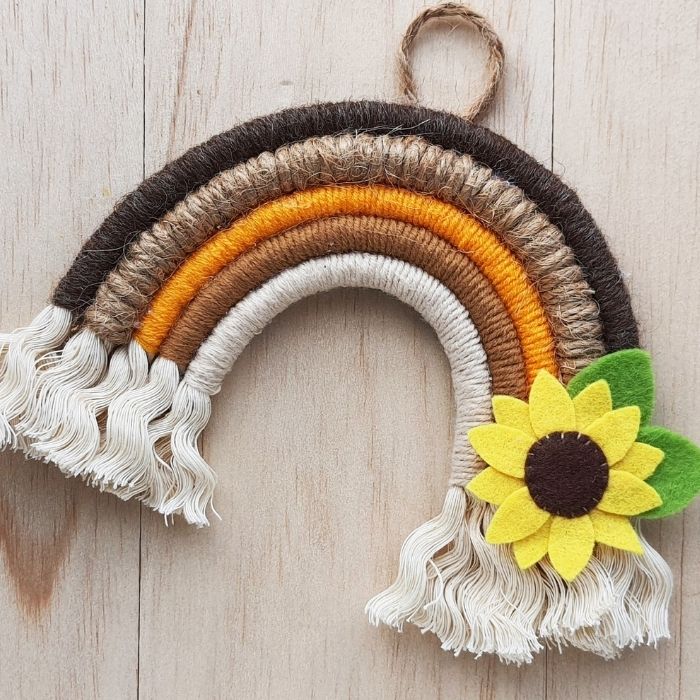
Table of contents
What Is Macrame
Macarame has been around for decades. It is a yarn and rope craft that uses a knotting technique to create stunning designs and pieces to showcase.
You will find that macrame creates layers of texture and design to decorate your home, office space and more.
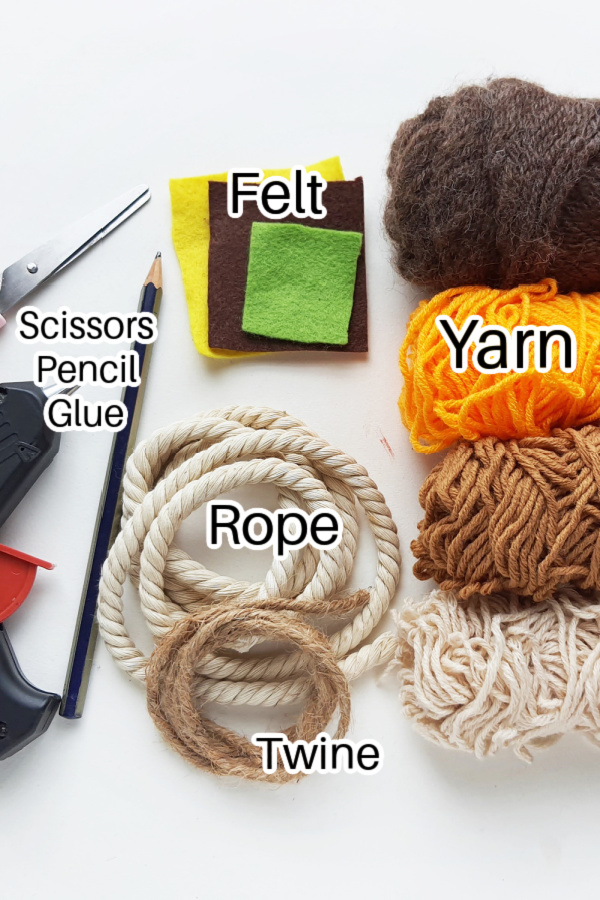
Supplies Needed
- Thick cotton rope
- 4 Colors of Yarn – any colors of yarn you want
- Felt – This will go on the back.
- Hot glue gun
- Scissors & Pencil
- Flower – This is an optional item but you could honestly add any small piece, like mine
How to Make
This is a visual walk through on how to make this rainbow project. The step by step free macrame pattern is below on how to create the perfect rainbow.
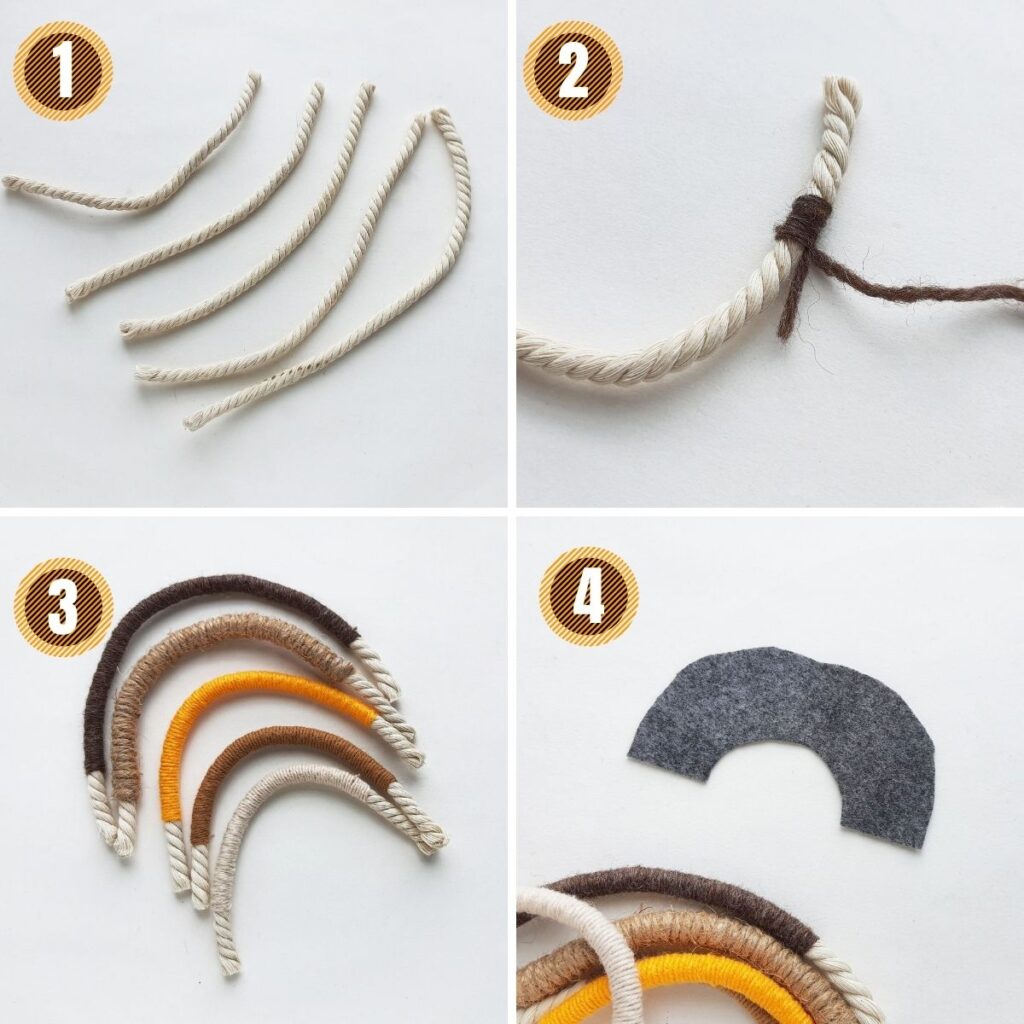
Step One: To start you will take your thick cotton rope and begin cutting strands. Place the first strand on the table. Then you will place a new string of rope by the first one. Make a “u” shape to mimic a rainbow.
Each rope will be a different size so using the previous rope you cut as a guide will ensure you cut to the proper size.
Step 2: Now you will take one color of yarn and tie on the end of a rope. Leave around 1 inch of cotton rope showing at the end. Begin wrapping the yarn neatly around the rope. Aim to wrap close together so it hides the rope.
Step 3: You will wrap the yarn all the way to the other side of the rope leaving an inch of rope showing at the end. Cut the yarn once you are done wrapping. Tie the yarn off like when you started.
Take a needle and push the end piece inside under the wrapped yarn to hide the end piece of yarn.
Step 4: Next take the felt and trace around a portion of the rainbow. This is going to be a backing to glue it together. Cut out the shape, making sure the felt is smaller than the rainbow. That way no one sees the felt.
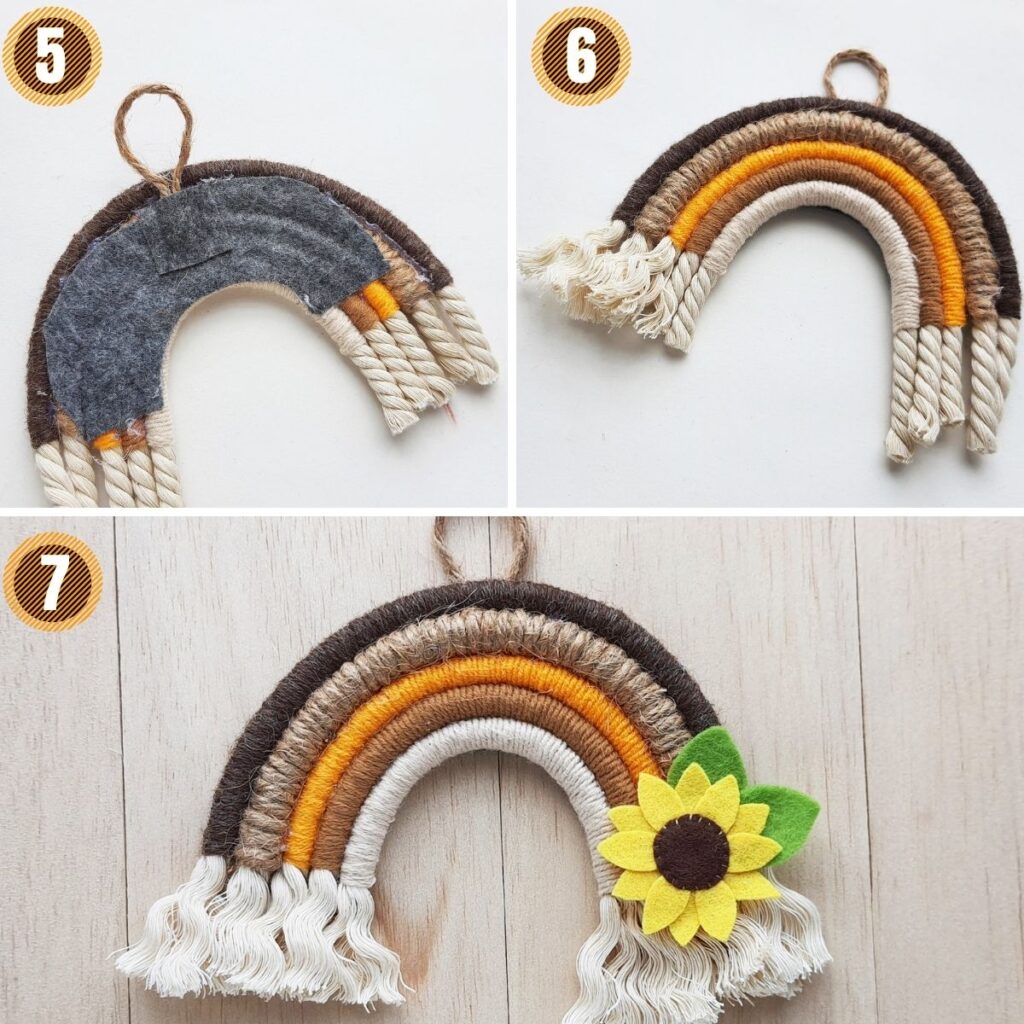
Step 5: Next, create a loop at top with the yarn for hanging. Then begin gluing each rope and the top loop onto the fabric.
Step 6: Once your macrame project is glued and set, you can unravel the end of each rope. If need be you can trim the fray if it looks too long.
Step 7: Optional: I put a sunflower on the front of the rainbow. I just got glued to it. Feel free to skip this step or swap with something different for a unique design.
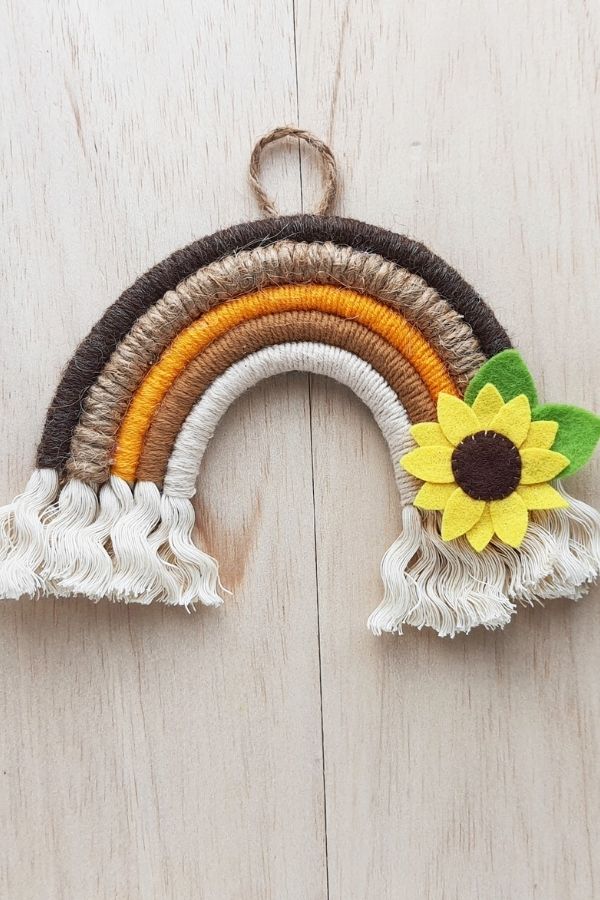
This DIY rainbow wall hanging is so fun and is gorgeous as a design piece for your home. I hope you all enjoy this macrame DIY as much as I have.
Common Questions
Some common questions when making this rope rainbow wall hanging craft.
If you want to use small wire and attach to the rope, just hold onto the wire and rope piece and wrap the yarn around both. The wire will help the rainbow hold its shape.
You are going to be the one who chooses how small or large you want to go. Just grab the yarn and rope to fit your project.
I recommend doing 3-4 layers of rope and yarn to make your rainbow macrame. But if you are making a large one you might find using 6-7 colors works better.
More Crafts To Try
- Perler Bead Earrings
- Harry Potter Wreath
- Clay Succulent Craft
- DIY Suncatcher Crafts
- IKEA Side Table DIY
How To Make A Macrame Rainbow
Learn how to make a macrame rainbow! This is an easy yarn craft that is so colorful and fun. You can go neutral rainbow or bright and bold. This macrame craft is so easy to make and a great decoration piece!
Materials
- Cotton Rope
- Yarn, 4 different Colors
- Twine
- Felt Fabric
Tools
- Hot Glue Gun
- Pencil
- Scissors
Instructions
- To start you will take your thick cotton rope and begin cutting strands. Place the first strand on the table.
- Then you will place a new string of rope by the first one. Make a “u” shape to mimic a rainbow. Each rope will be a different size so using the previous rope you cut as a guide will ensure you cut to the proper size.
- Now you will take one color of yarn and tie on the end of a rope. Leave around 1 inch of cotton rope showing at the end. Begin wrapping the yarn neatly around the rope.
- Aim to wrap close together so it hides the rope. You will wrap the yarn all the way to the other side of the rope leaving an inch of rope showing at the end. Cut the yarn once you are done wrapping.
- Tie the yarn off like when you started. Take a needle and push the end piece inside under the wrapped yarn to hide the end piece of yarn. Next take the felt and trace around a portion of the rainbow.
- This is going to be a backing to glue it together. Cut out the shape, making sure the felt is smaller than the rainbow.
- That way no one sees the felt. Next, create a loop at top with the yarn for hanging.
- Then begin gluing each rope and the top loop onto the fabric. Once your macrame project is glued and set, you can unravel the end of each rope.
- If need be you can trim the fray if it looks too long. I put a sunflower on the front of the rainbow. I just got glued to it. Feel free to skip this step or swap with something different for a unique design.
Notes
Size: When making your macrame rainbow the size is up to you. Do small and make macrame rainbow keychains, or do a large one for hanging on a wall. Or even make a nursery macrame mobile!
Colors: Use any colors of yarn you want.
Twine: I used twine for the way to hang my finished product. You could also use yarn if you don't have twine on hand.